在《springAOP之代理模式》中說了代理模式,包含靜態代理和動態代理,在動態代理模式中又分為JDK動態代理和CGlib動態代理,今天重點來看JDK動態代理。
一、概述
說到JDK動態代理就必須想到JDK動態代理要求有一個統一的接口,那為什麼要有接口,下面會說到,下面看我的接口類,
package cn.com.jdk.proxy;

public interface Subject {

    void sayHello(String a);
}
接口類很簡單就是一個簡單的方法定義。下面看實際的接口的實現類SubjectImpl,
package cn.com.jdk.proxy;

public class SubjectImpl implements Subject {

    @Override
    public void sayHello(String a) {
        // TODO Auto-generated method stub

        System.out.println("hello:"+a);
    }

}
實現類簡單的事項了Subject接口,進行了打印操作。下面看代理類
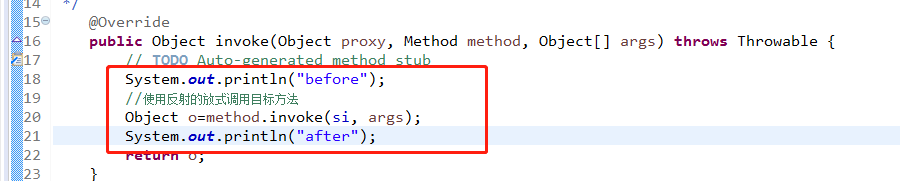
package cn.com.jdk.proxy;

import java.lang.reflect.InvocationHandler;
import java.lang.reflect.Method;

public class JDKProxy implements InvocationHandler {
    private SubjectImpl si;
    //此屬性不用管
    private String a;
/**
 * proxy  JDK動態生成的代理類的實例
 * method 目標方法的Method對象     Class.forName("cn.com.jdk.proxy.Subject").getMethod("sayHello", new Class[] { Class.forName("java.lang.String") });
 * args   目標方法的參數                       new Object[] { paramString }
 */
    @Override
    public Object invoke(Object proxy, Method method, Object[] args) throws Throwable {
        // TODO Auto-generated method stub
        System.out.println("before");
        //使用反射的放式調用si(被代理類)目標方法
        Object o=method.invoke(si, args);
        System.out.println("after");
        return o;
    }
    public JDKProxy(SubjectImpl si,String a) {
        this.si=si;
        this.a=a;
    }

}
上面是代理類的實現,在代理類中含義被代理類的一個引用,且提供了響應的構造方法。下面具體的使用,
package cn.com.jdk.proxy;

import java.lang.reflect.Proxy;

public class ProxyTest {

    public static void main(String[] args) {
        // TODO Auto-generated method stub
        //進行此項設置,可以在項目的com/sun/proxy目錄下找到JDK動態生成的代理類的字節碼文件
        System.getProperties().put("sun.misc.ProxyGenerator.saveGeneratedFiles","true");
        SubjectImpl si=new SubjectImpl();

        Subject subject=(Subject)Proxy.newProxyInstance(si.getClass().getClassLoader(), si.getClass().getInterfaces(), new JDKProxy(si,"111"));
        subject.sayHello("tom");

    }

}
上面是使用的代碼,通過Proxy類的newProxyInstance方法獲得一個Subject的實例,調用sayHello方法,下面看執行結果
before
hello:tom
after
可以看到執行了sayHello方法,且打印了before和after,這不正是代理類中invoke方法的執行嗎,看下面
很神奇的一件事,我們不光調用了sayHello方法,實現了打印,而且在加入了自己的打印方法,這不正是AOP的增強功能嗎。這一切是怎麼發生的那,下面細細說來。
二、詳述
上面,我們又複習了JDK動態代理的內容,以及演示了如何使用JDK動態代理,下面我們要看這是怎麼實現的,先從測試的下面這段代碼說起,也是最重要的代碼,JDK動態代理的精華都在這句代碼里,
Subject subject=(Subject)Proxy.newProxyInstance(si.getClass().getClassLoader(), si.getClass().getInterfaces(), new JDKProxy(si,"111"));
這句代碼是調用了Proxy類的newProxyInstance方法,此方法的入參如下,
public static Object newProxyInstance(ClassLoader loader,
                                          Class<?>[] interfaces,
                                          InvocationHandler h)
一共三個參數,一個是ClassLoader,這裏傳入的是被代理對象的類加載器;一個是Class,這裏傳入的是被代理對象所實現的接口;一個是InvocationHandler,這裏傳入的是代理類,代理類實現了InvocationHandler接口。
1、newProxyInstance方法
下面看newProxyInstance方法的定義,
@CallerSensitive
    public static Object newProxyInstance(ClassLoader loader,
                                          Class<?>[] interfaces,
                                          InvocationHandler h)
        throws IllegalArgumentException
    {
        Objects.requireNonNull(h);

        final Class<?>[] intfs = interfaces.clone();
        final SecurityManager sm = System.getSecurityManager();
        if (sm != null) {
            checkProxyAccess(Reflection.getCallerClass(), loader, intfs);
        }

        /*
         * Look up or generate the designated proxy class.
         */
          //1、使用代理類的類加載器和其所實現的接口,動態生成代理類
        Class<?> cl = getProxyClass0(loader, intfs);

        /*
         * Invoke its constructor with the designated invocation handler.
         */
        try {
            if (sm != null) {
                checkNewProxyPermission(Reflection.getCallerClass(), cl);
            }
            //2、返回JDK生成的代理類的構造方法,該構造方法的參數為
            //  InvocationHandler
            final Constructor<?> cons = cl.getConstructor(constructorParams);
            final InvocationHandler ih = h;
            if (!Modifier.isPublic(cl.getModifiers())) {
                AccessController.doPrivileged(new PrivilegedAction<Void>() {
                    public Void run() {
                        cons.setAccessible(true);
                        return null;
                    }
                });
            }
            //3、返回該構造方法的一個實例,也就是使用InvocationHandler為參數的構造方法利用反射的機制返回一個實例。
            return cons.newInstance(new Object[]{h});
        } catch (IllegalAccessException|InstantiationException e) {
            throw new InternalError(e.toString(), e);
        } catch (InvocationTargetException e) {
            Throwable t = e.getCause();
            if (t instanceof RuntimeException) {
                throw (RuntimeException) t;
            } else {
                throw new InternalError(t.toString(), t);
            }
        } catch (NoSuchMethodException e) {
            throw new InternalError(e.toString(), e);
        }
    }
該方法中有三步比較重要,上面的註釋已經標出。
1.1、getProxyClass0(loader, intfs)方法
該方法便是上面的第一步,這一步的作用是JDK返回一個代理類的實例,方法上的註釋如下,
/*
         * Look up or generate the designated proxy class.
         */
        Class<?> cl = getProxyClass0(loader, intfs);
註釋直譯過來是查找或者生成指定的代理類,這裡有兩層意思,一個是查找,第二個是生成,由此可以想到這個方法中應該有緩存,下面看方法的具體定義,
/**
     * Generate a proxy class.  Must call the checkProxyAccess method
     * to perform permission checks before calling this.
     */
    private static Class<?> getProxyClass0(ClassLoader loader,
                                           Class<?>... interfaces) {
        if (interfaces.length > 65535) {
            throw new IllegalArgumentException("interface limit exceeded");
        }

        // If the proxy class defined by the given loader implementing
        // the given interfaces exists, this will simply return the cached copy;
        // otherwise, it will create the proxy class via the ProxyClassFactory
        return proxyClassCache.get(loader, interfaces);
    }
這個方法很簡單,判斷了接口的數量,大於65535便拋異常,接口的數量大於65535的可能性不大。最後調用了proxyClassCache的get方法,首先看proxyClassCache,從字面上理解是代理類的緩存,看其定義,
/**
     * a cache of proxy classes
     */
    private static final WeakCache<ClassLoader, Class<?>[], Class<?>>
        proxyClassCache = new WeakCache<>(new KeyFactory(), new ProxyClassFactory());
是一個WeakCache對象實例,看下該構造方法,
/**
     * Construct an instance of {@code WeakCache}
     *
     * @param subKeyFactory a function mapping a pair of
     *                      {@code (key, parameter) -> sub-key}
     * @param valueFactory  a function mapping a pair of
     *                      {@code (key, parameter) -> value}
     * @throws NullPointerException if {@code subKeyFactory} or
     *                              {@code valueFactory} is null.
     */
    public WeakCache(BiFunction<K, P, ?> subKeyFactory,
                     BiFunction<K, P, V> valueFactory) {
        this.subKeyFactory = Objects.requireNonNull(subKeyFactory);
        this.valueFactory = Objects.requireNonNull(valueFactory);
    }
看了該類的構造方法后,回到proxyClassCache.get(loader, interfaces)方法的調用,我們已經知道proxyClassCache是WeakCache的一個實例,那麼get方法如下,
 /**
     * Look-up the value through the cache. This always evaluates the
     * {@code subKeyFactory} function and optionally evaluates
     * {@code valueFactory} function if there is no entry in the cache for given
     * pair of (key, subKey) or the entry has already been cleared.
     *
     * @param key       possibly null key
     * @param parameter parameter used together with key to create sub-key and
     *                  value (should not be null)
     * @return the cached value (never null)
     * @throws NullPointerException if {@code parameter} passed in or
     *                              {@code sub-key} calculated by
     *                              {@code subKeyFactory} or {@code value}
     *                              calculated by {@code valueFactory} is null.
     */
    public V get(K key, P parameter) {
        Objects.requireNonNull(parameter);

        expungeStaleEntries();

        Object cacheKey = CacheKey.valueOf(key, refQueue);

        // lazily install the 2nd level valuesMap for the particular cacheKey
        ConcurrentMap<Object, Supplier<V>> valuesMap = map.get(cacheKey);
        if (valuesMap == null) {
            ConcurrentMap<Object, Supplier<V>> oldValuesMap
                = map.putIfAbsent(cacheKey,
                                  valuesMap = new ConcurrentHashMap<>());
            if (oldValuesMap != null) {
                valuesMap = oldValuesMap;
            }
        }

        // create subKey and retrieve the possible Supplier<V> stored by that
        // subKey from valuesMap
        Object subKey = Objects.requireNonNull(subKeyFactory.apply(key, parameter));
        Supplier<V> supplier = valuesMap.get(subKey);
        Factory factory = null;

        while (true) {
            if (supplier != null) {
                // supplier might be a Factory or a CacheValue<V> instance
                V value = supplier.get();
                if (value != null) {
                    return value;
                }
            }
            // else no supplier in cache
            // or a supplier that returned null (could be a cleared CacheValue
            // or a Factory that wasn't successful in installing the CacheValue)

            // lazily construct a Factory
            if (factory == null) {
                factory = new Factory(key, parameter, subKey, valuesMap);
            }

            if (supplier == null) {
                supplier = valuesMap.putIfAbsent(subKey, factory);
                if (supplier == null) {
                    // successfully installed Factory
                    supplier = factory;
                }
                // else retry with winning supplier
            } else {
                if (valuesMap.replace(subKey, supplier, factory)) {
                    // successfully replaced
                    // cleared CacheEntry / unsuccessful Factory
                    // with our Factory
                    supplier = factory;
                } else {
                    // retry with current supplier
                    supplier = valuesMap.get(subKey);
                }
            }
        }
    }
上面是WeakCache的get方法,這個方法暫時不作說明,後面會詳細介紹WeakCache類,請參見《JDK動態代理之WeakCache 》。這裏只需記住該get方法會返回一個代理類的實例即可。那麼此代理類是如何定義的那?
1.1.1、$Proxy0.class代理類
這個代理類是JDK動態生成的,其命名規則為以“$”開頭+Proxy+“從0開始的序列”。上面在測試的時候,我們加入了下面這行代碼,
//進行此項設置,可以在項目的com/sun/proxy目錄下找到JDK動態生成的代理類的字節碼文件
        System.getProperties().put("sun.misc.ProxyGenerator.saveGeneratedFiles","true");
註釋中寫到可以生成代理類的字節碼文件,下面是使用反編譯工具過來的java代碼,
package com.sun.proxy;

import cn.com.jdk.proxy.Subject;
import java.lang.reflect.InvocationHandler;
import java.lang.reflect.Method;
import java.lang.reflect.Proxy;
import java.lang.reflect.UndeclaredThrowableException;

public final class $Proxy0 extends Proxy
  implements Subject
{
  private static Method m1;
  private static Method m3;
  private static Method m2;
  private static Method m0;
 //參數為InvocationHandler的構造方法
  public $Proxy0(InvocationHandler paramInvocationHandler)
    throws
  {
   //調用父類Proxy的構造方法,在父類的構造方法中會初始化h屬性
    super(paramInvocationHandler);
  }

  public final boolean equals(Object paramObject)
    throws
  {
    try
    {
      return ((Boolean)this.h.invoke(this, m1, new Object[] { paramObject })).booleanValue();
    }
    catch (RuntimeException localRuntimeException)
    {
      throw localRuntimeException;
    }
    catch (Throwable localThrowable)
    {
    }
    throw new UndeclaredThrowableException(localThrowable);
  }
//實現的Subject的sayHello方法
  public final void sayHello(String paramString)
    throws
  {
    try
    {
      //調用h的invoke方法,這裏的h指的是實現了InvocationHandler的類
      //調用其中的invoke方法,在本例中是調用JDKProxy類中的invoke方
      //法
      this.h.invoke(this, m3, new Object[] { paramString });
      return;
    }
    catch (RuntimeException localRuntimeException)
    {
      throw localRuntimeException;
    }
    catch (Throwable localThrowable)
    {
    }
    throw new UndeclaredThrowableException(localThrowable);
  }

  public final String toString()
    throws
  {
    try
    {
      return (String)this.h.invoke(this, m2, null);
    }
    catch (RuntimeException localRuntimeException)
    {
      throw localRuntimeException;
    }
    catch (Throwable localThrowable)
    {
    }
    throw new UndeclaredThrowableException(localThrowable);
  }

  public final int hashCode()
    throws
  {
    try
    {
      return ((Integer)this.h.invoke(this, m0, null)).intValue();
    }
    catch (RuntimeException localRuntimeException)
    {
      throw localRuntimeException;
    }
    catch (Throwable localThrowable)
    {
    }
    throw new UndeclaredThrowableException(localThrowable);
  }

  static
  {
    try
    {
      m1 = Class.forName("java.lang.Object").getMethod("equals", new Class[] { Class.forName("java.lang.Object") });
      m3 = Class.forName("cn.com.jdk.proxy.Subject").getMethod("sayHello", new Class[] { Class.forName("java.lang.String") });
      m2 = Class.forName("java.lang.Object").getMethod("toString", new Class[0]);
      m0 = Class.forName("java.lang.Object").getMethod("hashCode", new Class[0]);
      return;
    }
    catch (NoSuchMethodException localNoSuchMethodException)
    {
      throw new NoSuchMethodError(localNoSuchMethodException.getMessage());
    }
    catch (ClassNotFoundException localClassNotFoundException)
    {
    }
    throw new NoClassDefFoundError(localClassNotFoundException.getMessage());
  }
}
上面是反編譯過來的JDK生成的代理類的代碼,包含了一個使用InvocationHandler作為參數的構造方法,以及實現了Subject接口的sayHello方法。上面註釋中寫到該構造方法調用了其父類Proxy的構造方法,下面看其父類Proxy的構造方法,
protected Proxy(InvocationHandler h) {
        Objects.requireNonNull(h);
        this.h = h;
    }
把InvocationHandler的值賦給了h,h的定義如下,
protected InvocationHandler h;
那麼在生成的代理類中自然會繼承該屬性,所以在代理類中的sayHello中使用下面的方法調用,
public final void sayHello(String paramString)
    throws
  {
    try
    {
      this.h.invoke(this, m3, new Object[] { paramString });
      return;
    }
    catch (RuntimeException localRuntimeException)
    {
      throw localRuntimeException;
    }
    catch (Throwable localThrowable)
    {
    }
    throw new UndeclaredThrowableException(localThrowable);
  }
上面的this.h便是其父類的h屬性。在上面的this.h.invoke中的m3是怎麼來的那,看下面,
 static
  {
    try
    {
      m1 = Class.forName("java.lang.Object").getMethod("equals", new Class[] { Class.forName("java.lang.Object") });
      m3 = Class.forName("cn.com.jdk.proxy.Subject").getMethod("sayHello", new Class[] { Class.forName("java.lang.String") });
      m2 = Class.forName("java.lang.Object").getMethod("toString", new Class[0]);
      m0 = Class.forName("java.lang.Object").getMethod("hashCode", new Class[0]);
      return;
    }
    catch (NoSuchMethodException localNoSuchMethodException)
    {
      throw new NoSuchMethodError(localNoSuchMethodException.getMessage());
    }
    catch (ClassNotFoundException localClassNotFoundException)
    {
    }
    throw new NoClassDefFoundError(localClassNotFoundException.getMessage());
  }
在該類的靜態代碼塊中給出了4個屬性。
1.2、getConstructor(constructorParams)方法
在上面的getProxyClass0方法中我們知道該方法會返回一個JDK生成代理類的Class對象,此類的定義便是上面的$Proxy0.class類。其定義在上面已經分析過。getConstructor方法要返回一個以constructorParams為參數的構造方法,
@CallerSensitive
    public Constructor<T> getConstructor(Class<?>... parameterTypes)
        throws NoSuchMethodException, SecurityException {
        checkMemberAccess(Member.PUBLIC, Reflection.getCallerClass(), true);
        return getConstructor0(parameterTypes, Member.PUBLIC);
    }
調用了getConstuctor0方法返回一個public的構造方法,
private Constructor<T> getConstructor0(Class<?>[] parameterTypes,
                                        int which) throws NoSuchMethodException
    {
        Constructor<T>[] constructors = privateGetDeclaredConstructors((which == Member.PUBLIC));
        for (Constructor<T> constructor : constructors) {
            if (arrayContentsEq(parameterTypes,
                                constructor.getParameterTypes())) {
                return getReflectionFactory().copyConstructor(constructor);
            }
        }
        throw new NoSuchMethodException(getName() + ".<init>" + argumentTypesToString(parameterTypes));
    }
上面的方法會返回一個public的構造方法。
回到最初的調用,我們看getConstructor方法的參數是constructorParams,此屬性定義如下,
/** parameter types of a proxy class constructor */
    private static final Class<?>[] constructorParams =
        { InvocationHandler.class };
是一個Class數組,其類型為InvocationHandler。這樣便可以知道是通過代理類的Class對象返回其構造方法cons。有了構造方法下面便是通過構造方法生成實例。
1.3、cons.newInstance(new Object[]{h})方法
此方法便是通過構造方法返回一個代理類的實例。
上面分析了Proxy的newProxyInstance方法,此方法最終會返回一個代理類的實例,會經過下面幾個步驟,
從上面的步驟,我們知道在獲得代理類的構造方法時,是獲得其參數為InvocationHandler的構造方法,所以肯定要實現InvocationHandler接口,在本例中便是JDKProxy類,這個類實現了這個接口。值開篇我們講到JDK動態代理必須要有統一的接口,從上面的步驟中我們知道在生成代理類的Class對象時使用了兩個參數,一個ClassLoader,另一個是接口,這裏就是為什麼要有統一的接口,因為在生成代理類的Class對象中需要接口,所以被代理類必須要有一個接口。
2、方法調用
這裏的方法調用,便是對應使用方法中的下面這行代碼,
subject.sayHello("tom");
在上面的分析中獲得了一個代理類的實例,即下面這行代碼,
Subject subject=(Subject)Proxy.newProxyInstance(si.getClass().getClassLoader(), si.getClass().getInterfaces(), new JDKProxy(si,"111"));
通過使用被代理類的類加載器、被代理類所實現的接口、實現了InvocationHandler接口的類的實例三個參數,返回了一個代理類的實例。上面已經詳細分析過。此代理類的實例繼承了Proxy,實現了Subject接口。其sayHello方法如下,
public final void sayHello(String paramString)
    throws
  {
    try
    {
      this.h.invoke(this, m3, new Object[] { paramString });
      return;
    }
    catch (RuntimeException localRuntimeException)
    {
      throw localRuntimeException;
    }
    catch (Throwable localThrowable)
    {
    }
    throw new UndeclaredThrowableException(localThrowable);
  }
上面已經分析過,this.h是InvocationHandler的實例,這裏便是new JDKProxy(si,”111″),m3是m3 = Class.forName(“cn.com.jdk.proxy.Subject”).getMethod(“sayHello”, new Class[] { Class.forName(“java.lang.String”) });下面看JDKProxy中的invoke方法,
@Override
    public Object invoke(Object proxy, Method method, Object[] args) throws Throwable {
        // TODO Auto-generated method stub
        System.out.println("before");
        //使用反射的放式調用目標方法
        Object o=method.invoke(si, args);
        System.out.println("after");
        return o;
    }
此方法的三個參數分別為代理類的實例、Method對象(sayHello),調用sayHello時的參數,所以要調用被代理類的sayHello方法,需要這樣寫:method.invoke(si,args),即調用被代理類(SubjectImpl)的sayHello方法,參數為args(tom)。下面是一個簡單的方法調用過程,
三、總結
本文分析了JDK動態代理的簡單使用方法及背後的原理,有不當之處歡迎指正,感謝!
本站聲明:網站內容來源於博客園,如有侵權,請聯繫我們,我們將及時處理
【其他文章推薦】
※廣告預算用在刀口上,台北網頁設計公司幫您達到更多曝光效益
※別再煩惱如何寫文案,掌握八大原則!
※教你寫出一流的銷售文案?
※超省錢租車方案
※FB行銷專家,教你從零開始的技巧